This post can help you to understand the “Designing a simple SSIS package using SQL Server 2016” and SSIS Project Deployment Model in SQL Server 2016. Project Deployment Model is introduced in SQL Server 2012 and provides more flexibility in deploying, monitoring and maintaining SSIS packages. Here in this post we’ll take a simple example and see how to deploy SSIS package and use a single SSIS package for multiple environments. For implementation we used:
- SQL Server Data Tools 2015
- SQL Server 2016 Database
- SQL Server Management Studio 2017
ETL Requirement:
We are going to design and deploy a SSIS package for a simple ETL requirement. We have a customer table and we’ll get the customer data feed as a flat file on daily basis. We just need to design a SSIS package that should fetch extract data from flat file and insert into customer table by following the below given conditions. To simplify the requirement this is not an incremental load instead we get only the new customer information. Here are the rules:
- SSIS package should be deployed on dedicated SSIS SQL Server 2016 instance
- We should be able to change the Flat File Path, SQL Server Instance Name, User Name, Password, and Database Name. It means we should be able to provide these values at runtime.
- The same package hosted on dedicated instance should be used for all 3 environments (Development, QA and Production)
- Customer table has to be truncated before loading data
ETL Solution:
We are going to design a simple ETL package and deploy using Project Deployment model. Here are the details:
| Source | Flat File – Customer Information | ||||
| Destination | SQL Server – 3 Environments | ||||
| Environment | Instance/ Server | Database | Table | Login | Password |
| Development | 127.0.0.1,1435 | ETL2017_DEV | Customer | ETL_PreProd | XXXXXXX |
| QA | 127.0.0.1,1435 | ETL2017_QA | Customer | ETL_PreProd | XXXXXXX |
| Production | 127.0.0.1,1436 | ETL2017_PROD | Customer | ETL_Prod | XXXXXXX |
Creating Integration Services Catalogs:
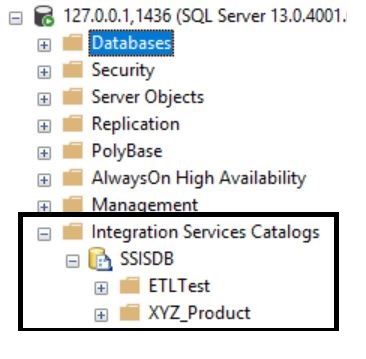
Before SQL Server 2012 we used to store SSIS packages either in MSDB or in physical file and parameters and configurations in XML file or in SQL Server table. But from 2012 game is changed and now we have “Integration Service Catalogs” introduced. By default there are no catalogues created and we have to create a new catalog and it automatically creates “SSISDB”. All SSIS packages and configurations, parameters are stored in SSISDB. Here is a good article that explains how to create a SSIS catalog. I have created SSIS catalog and added a new folder called XYZ_Product
Creating Production, Development and QA Databases:
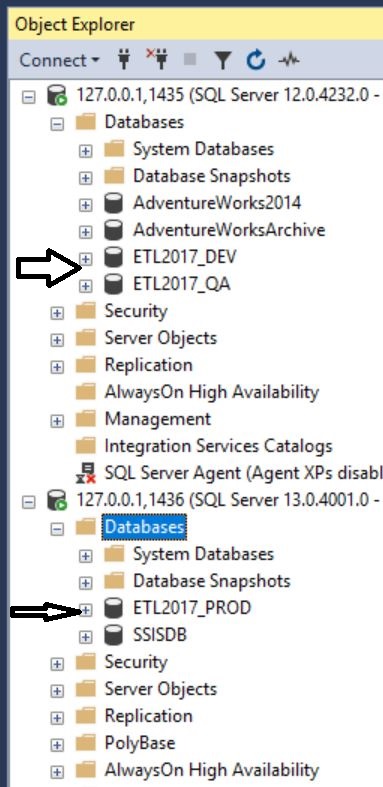
We have created DEV and QA databases on one instance and Production database on other instance as below:
Designing ETL Package:
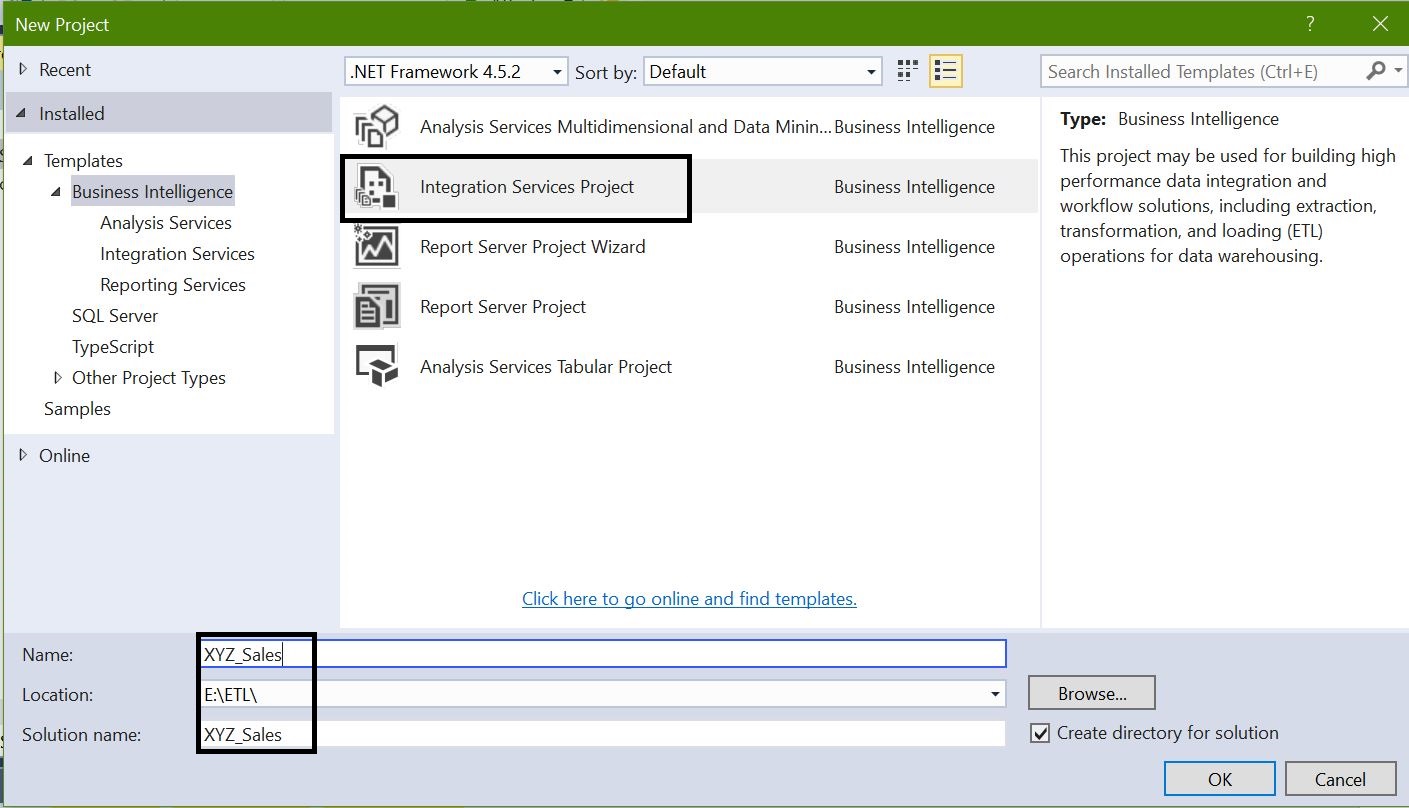
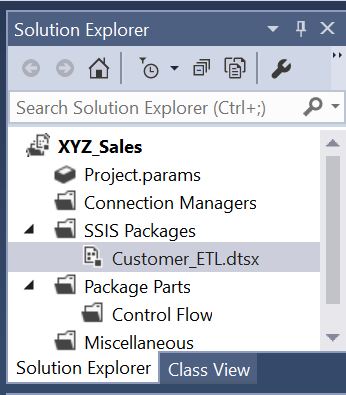
I am using SQL Server Data Tools 2015. Open SSDT and create a new SSIS project, select the project location. Once project created them rename the package as “Customer_ETL”.
As per requirement we need to parameterise source and destination values thereof we are going to create project parameters. Double click on project parameters and create below parameters.
“FlatFilePath, Database,, Table, Server, User, Password”. If you observe that I made the parameter password as sensitive that means it doesn’t show the value of password.
Now we’ll add connection managers:
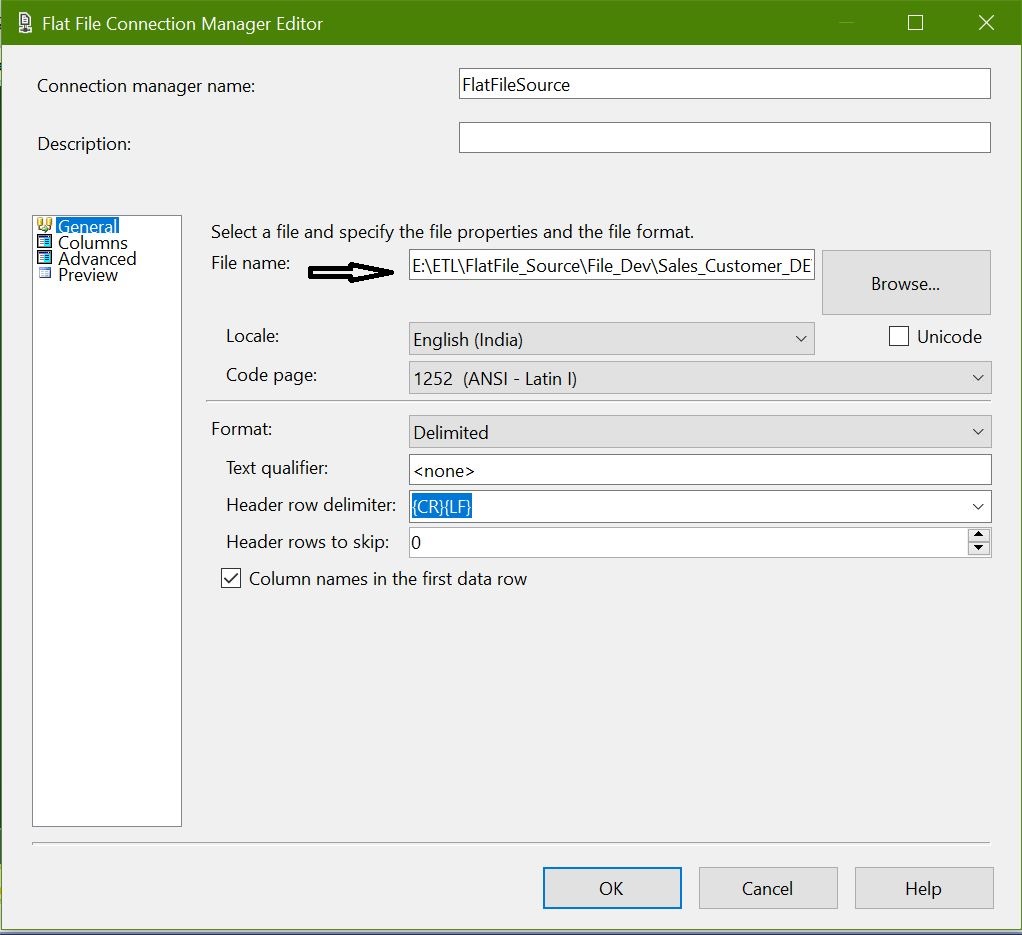
Flat File Connection: FlatFileSource
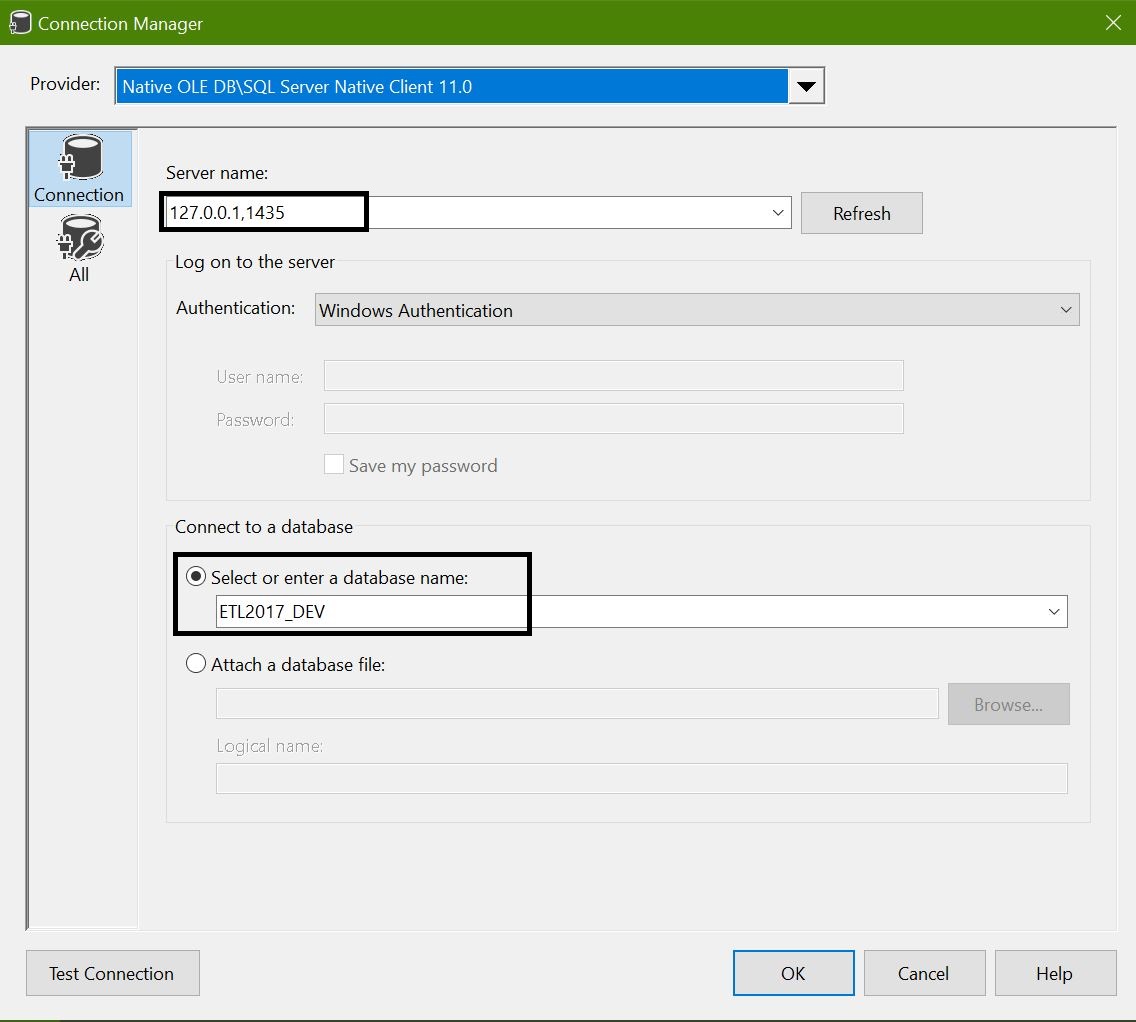
OLE DB Destination: SQLDestination
Add these connections as shown in below:
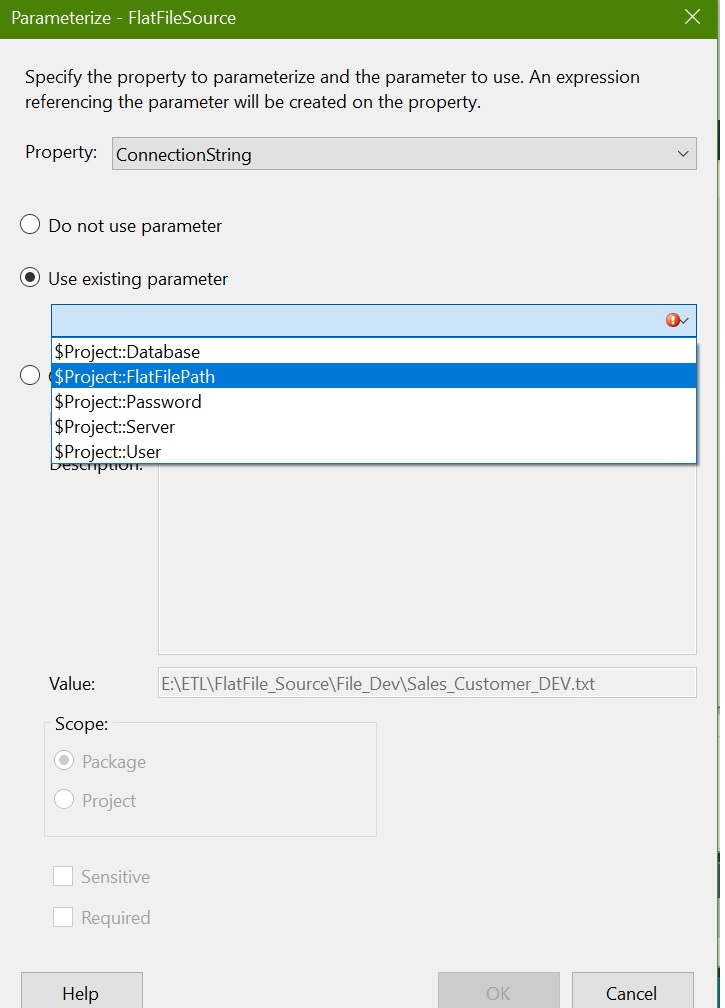
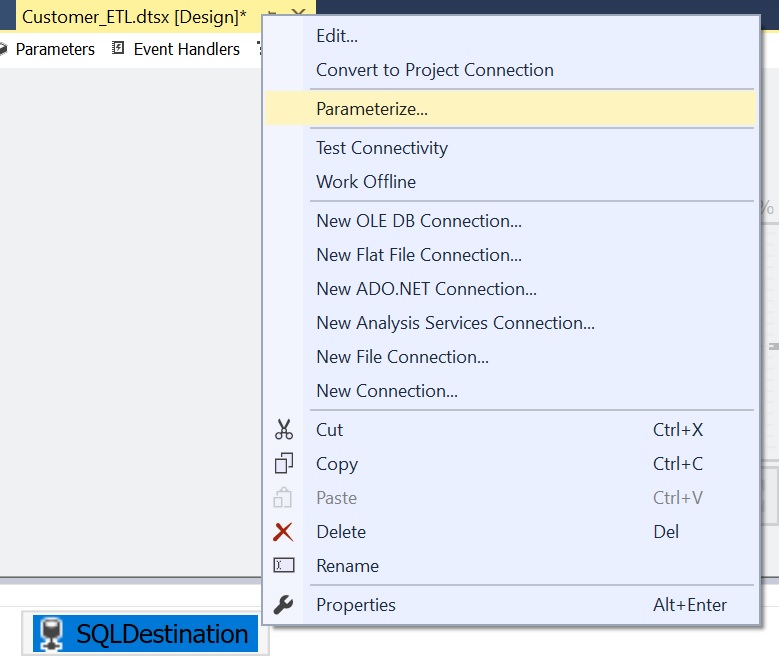
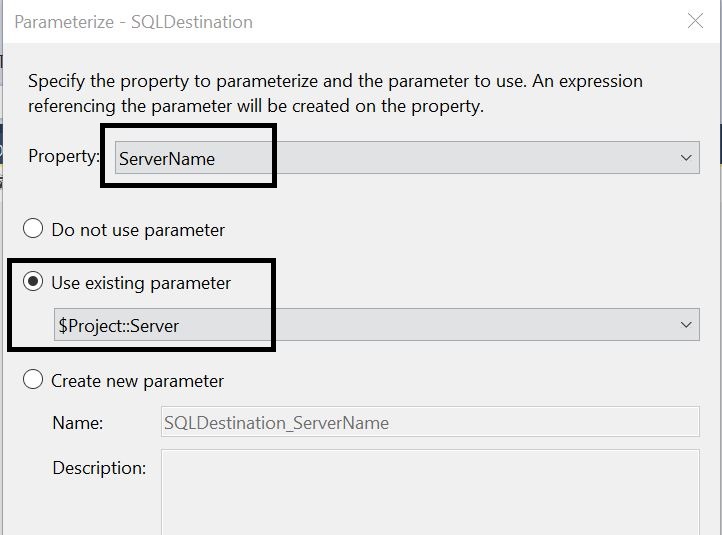
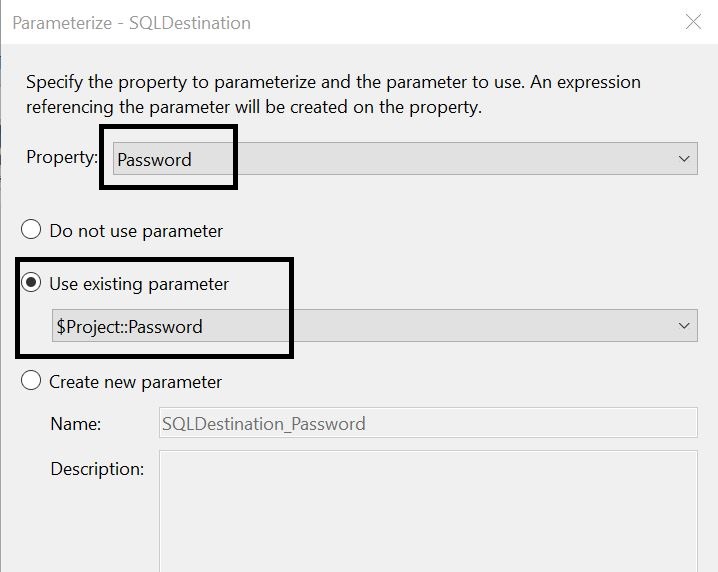
We need to parameterise the inputs. We’ll map project parameters with “FlatFileSource” & “SQLDestination”.
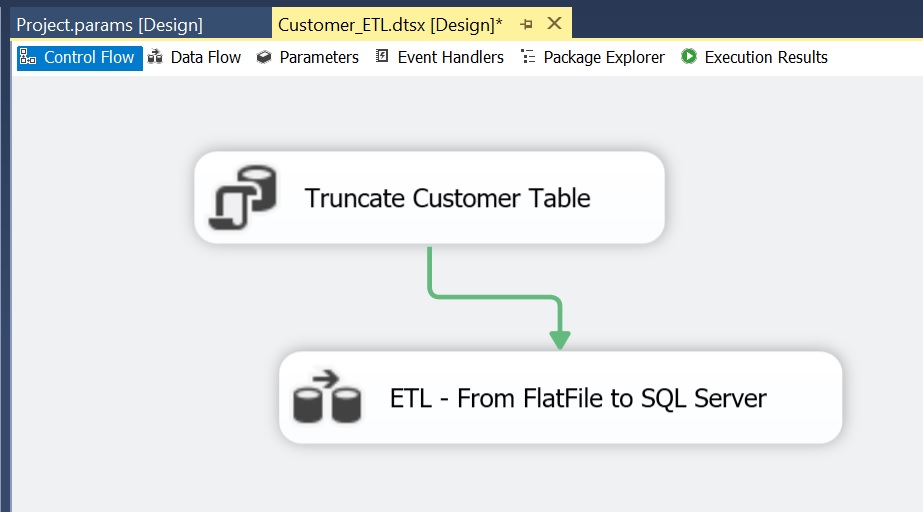
Now we’ll design the control flow:
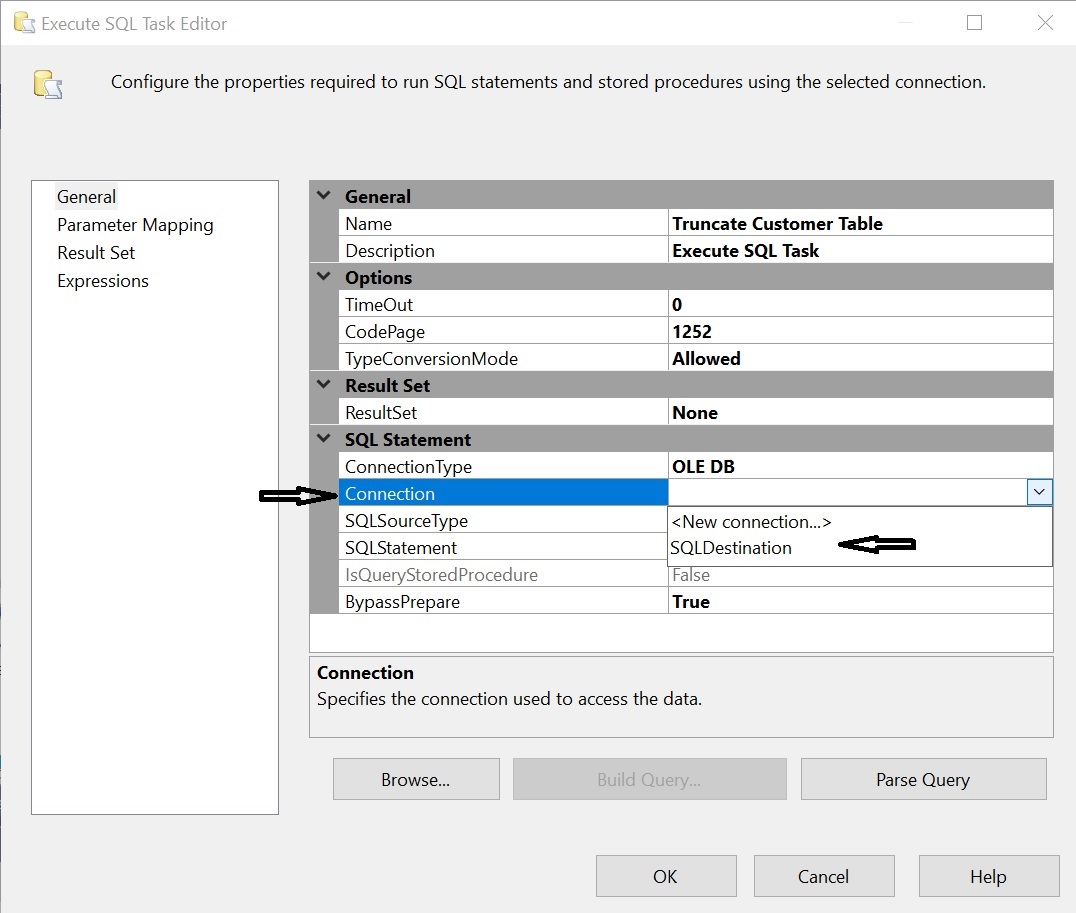
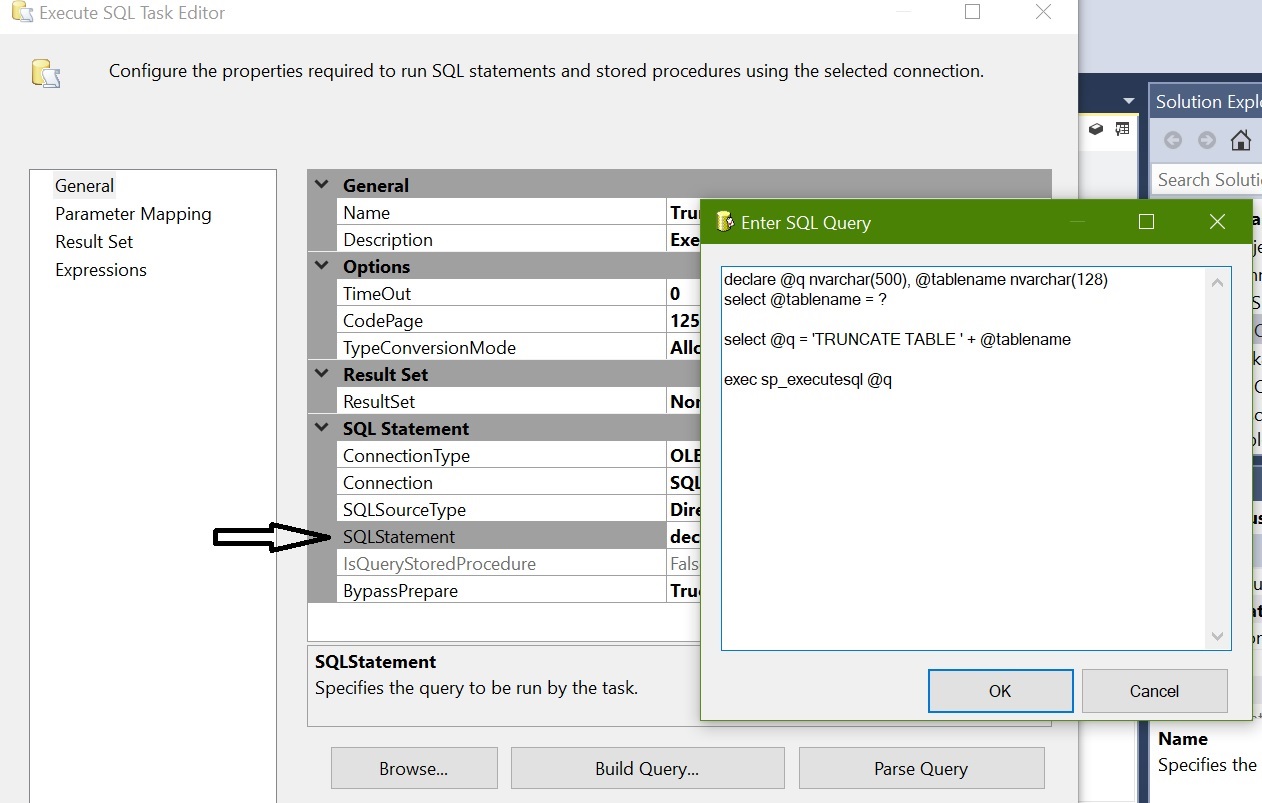
EXECUTE SQL Task: Truncating the existing Data from the table Customer
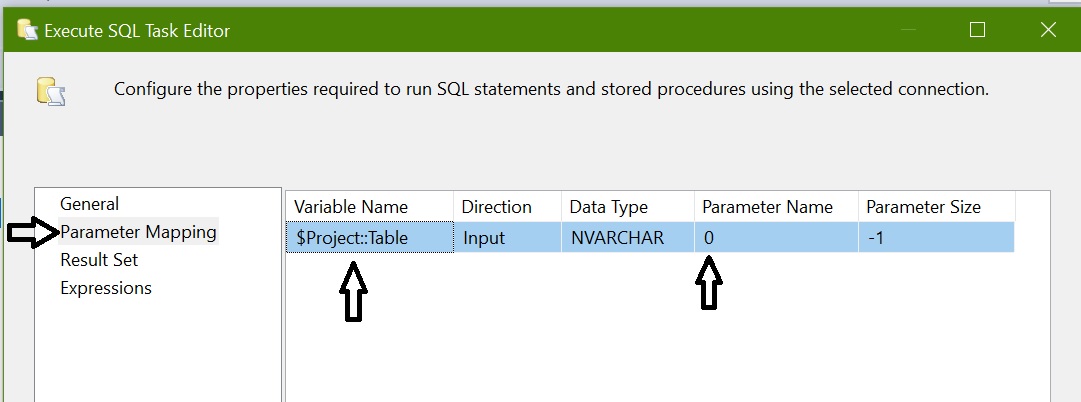
Since we are using the TableName as an input and we can change the value of table name dynamically we should map it with TRUNCATE statement as below:
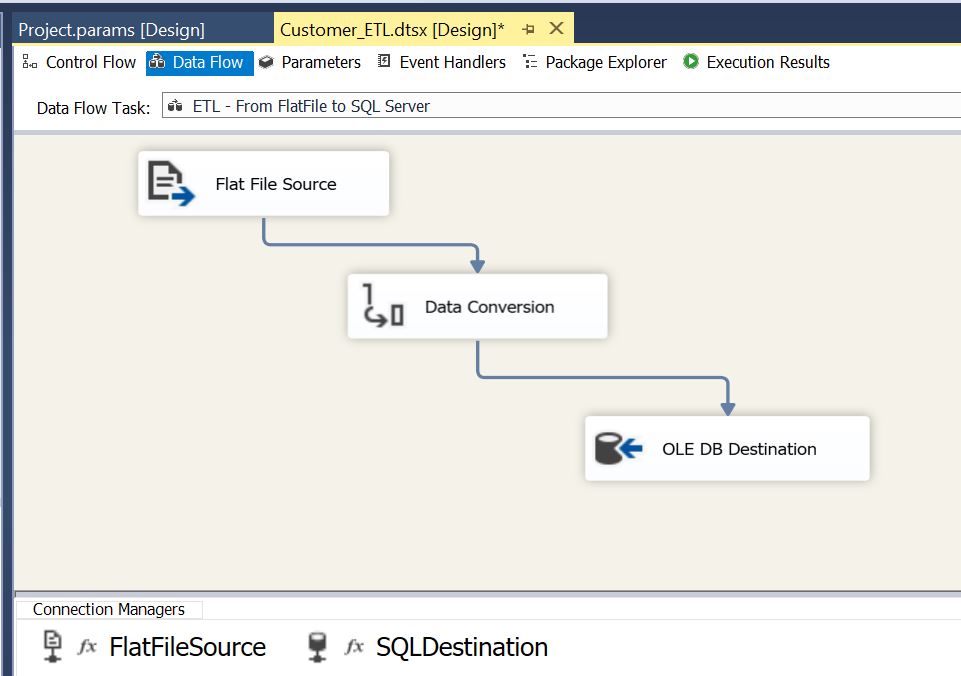
Data Flow Task: Extract – Transfer – Load data from flat file to SQL Server
- Flat File Source: To extract data from Text file
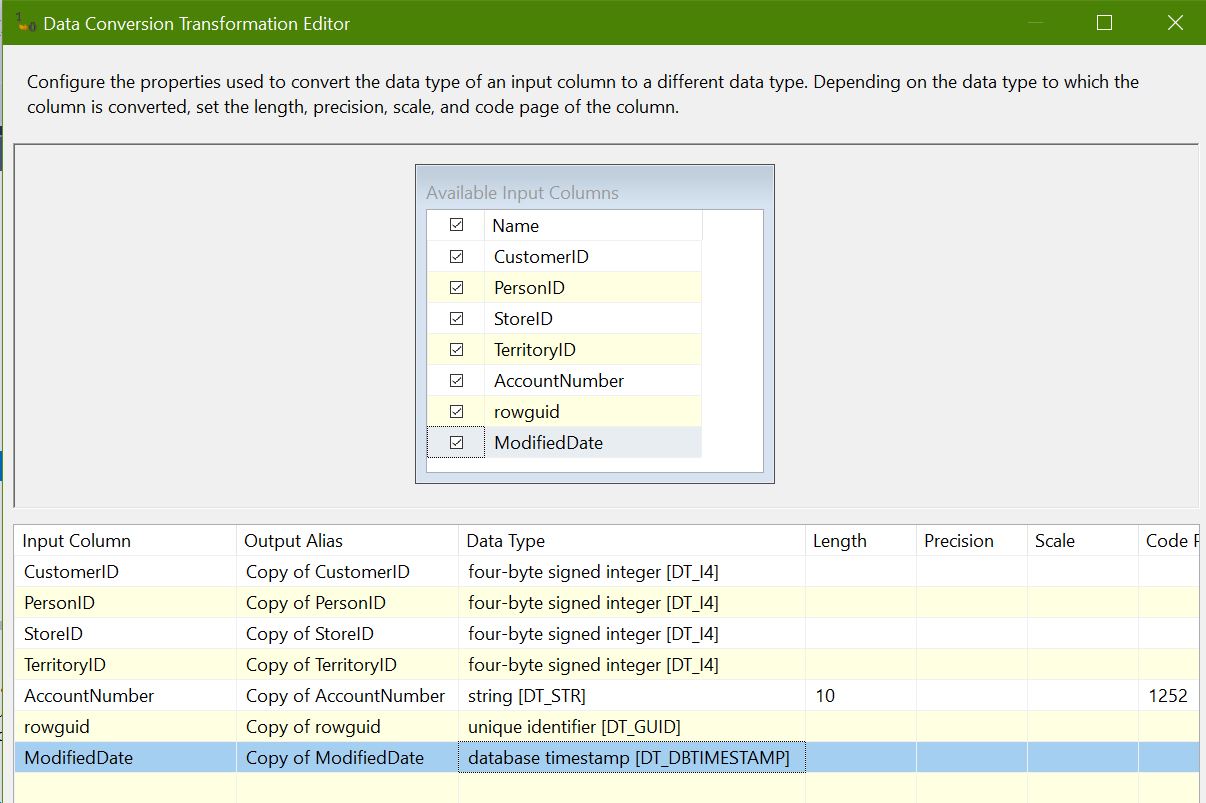
- Data Conversion Transformation: To convert data to match the destination table
- OLEDB Destination: To load data into SQL Server
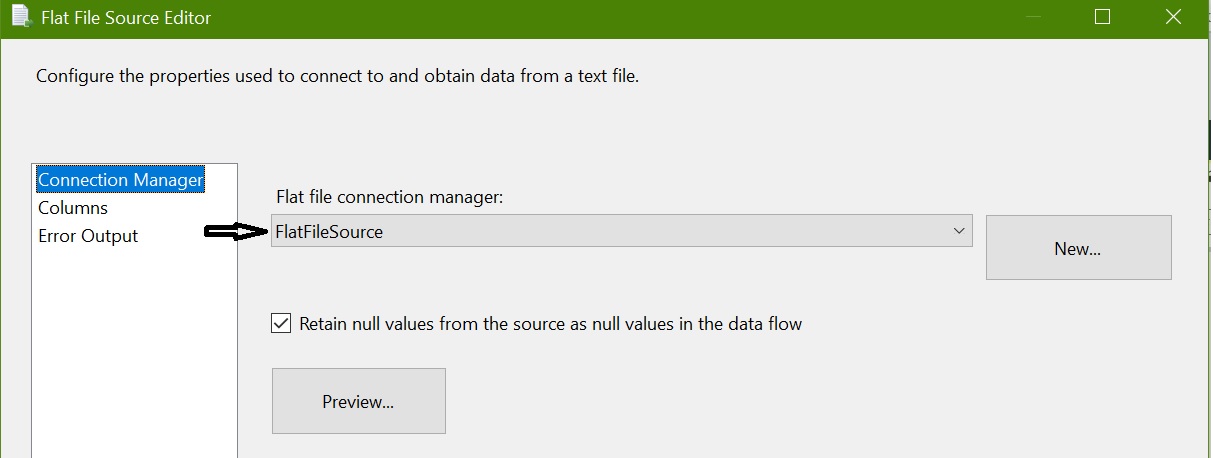
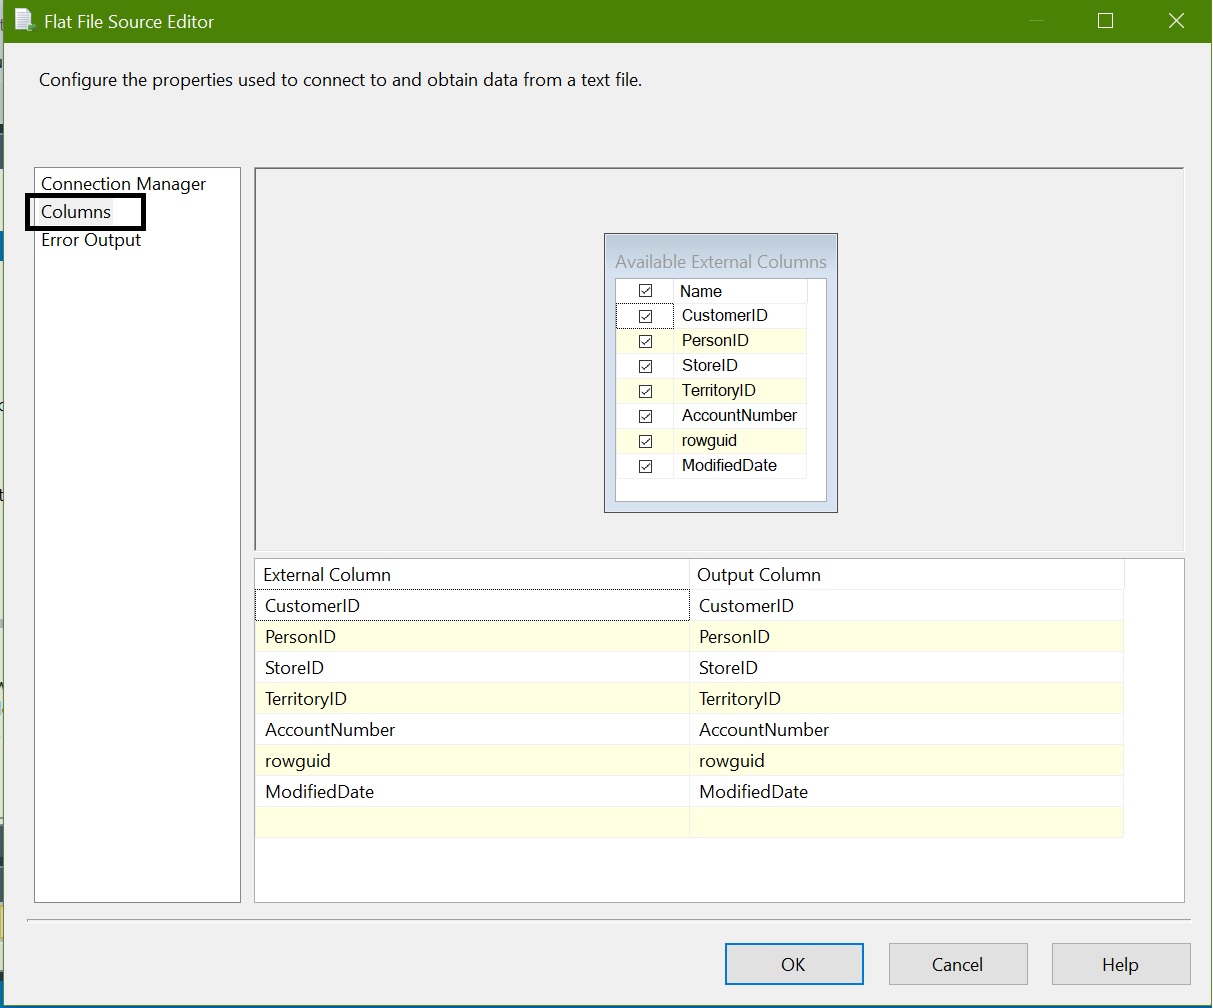
Flat File Source: Select the Flat File Source Connection and check the columns
Data Conversion Transformation: Add Data Conversion and select all columns and modify datatype as per the table metadata defined in SQL Server database.
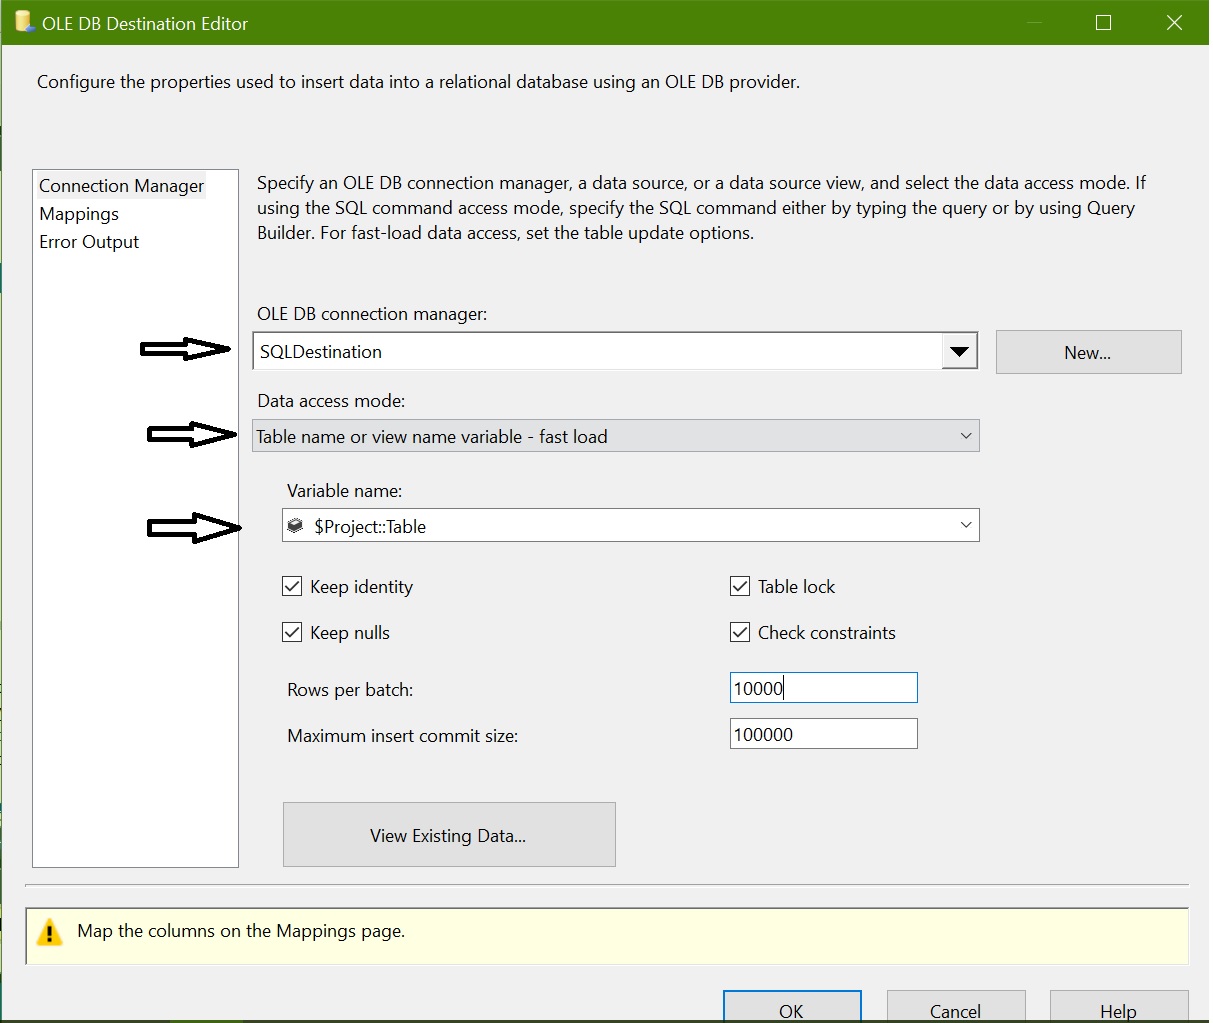
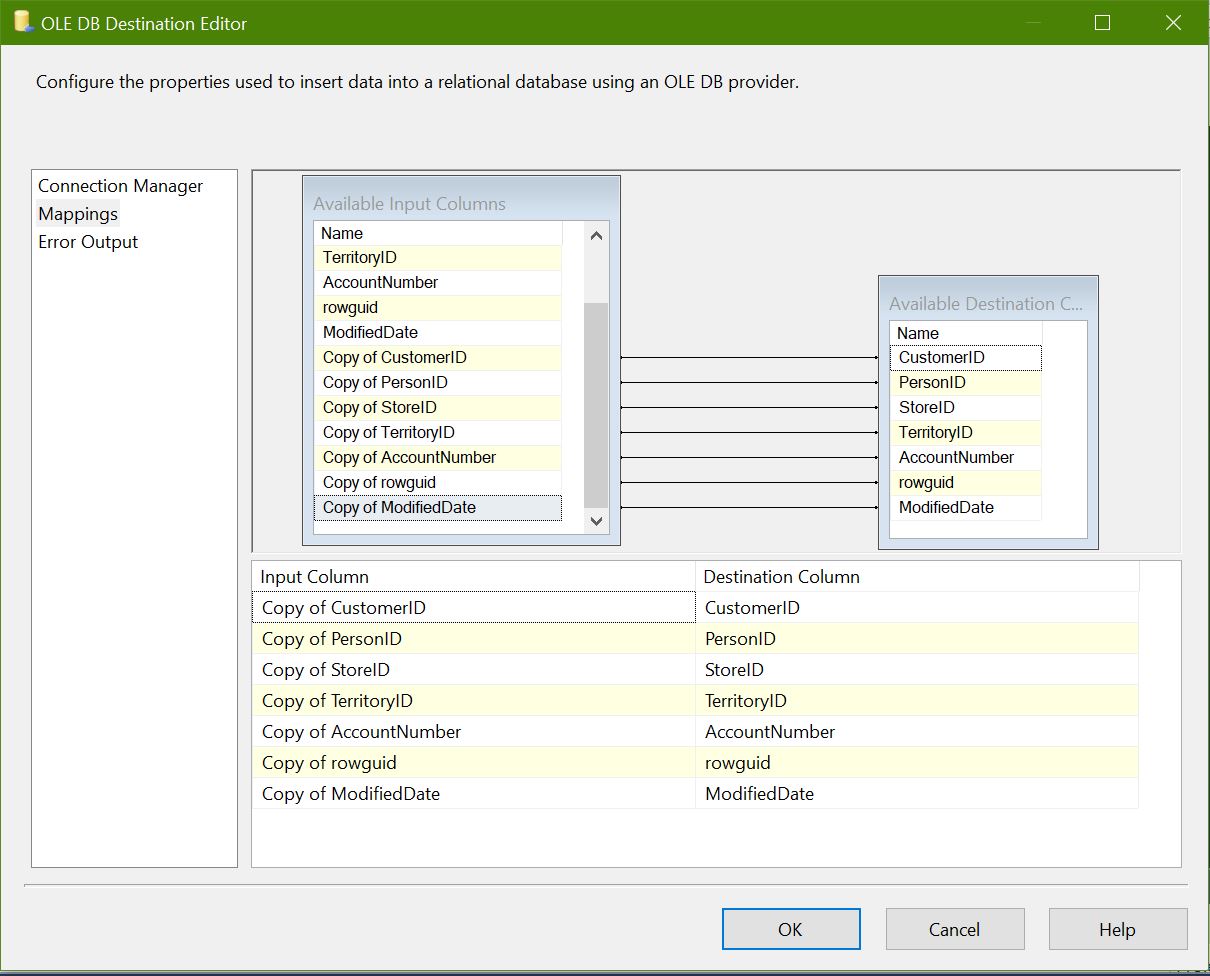
OLEDB Destination: Map the connection manager SQLDestination and select all required options
Data Access Mode: Since we need to parameterise the table name select “Table Name or View Name Variable – Fast Load”.
Variable Name: Select the variable names “Table” that we defined in project parameters
ETL Package – Execution:
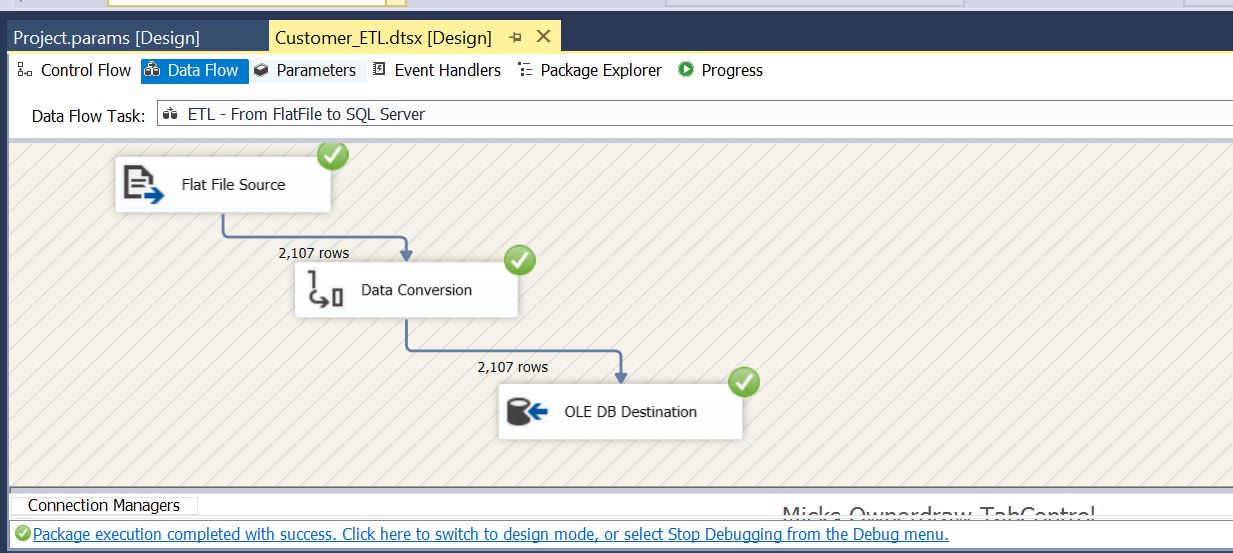
Now we’ll execute it from SQL Server Data Tools using the default values given for project parameters.
Deploying SSIS Package for Multiple Environments:
Now we’ll see how we can deploy a SSIS package for multiple environments in SQL Server 2016. Here is the post for deploying SSIS package for DEV, QA and Production environments.
Summary:
- We have created a simple package to load data into SQL Server instance
- As per the requirement all source and destination connections strings are parameterised using Project Parameters.
- In the next post we’ll see how to deploy and use a SSIS package for multiple environments.









[…] model in SSIS”. We have already created a SSIS package and environment is ready to deploy. Here are the ETL requirement and package details. We are going to deploy the package into SQL Server […]